This post may contain affiliate links. As an Amazon associate, Google associate as well as associate for other programs, Guitar & Music Institute may earn commissions from qualifying purchases.
Key Takeaways:
- Proper guitar setup is essential for quality sound and playability
- A well-maintained instrument provides greater comfort and control for players
- Guitar setup should be a regular part of maintenance for both beginner and pro players
- Following a guitar setup guide can help achieve optimal performance and enjoyment
- Improved tone and playability are just a few of the benefits of a properly set up guitar
The Basics of Guitar Setup
Setting up your guitar can seem daunting at first, but with these simple steps, you’ll be able to get your instrument in optimal condition for playing. First, start by checking the overall condition of your guitar. Look for any noticeable cracks, dents or scratches that may affect the guitar’s performance. Once you’re satisfied with the guitar’s condition, follow this guitar setup checklist:| Truss Rod Adjustment | Action Adjustment | Intonation Adjustment |
|---|---|---|
| Adjust the neck curvature using the truss rod to get the right amount of relief. You can use a capo on the first fret and press the final fret to see if the neck has the right amount of relief. | Adjust the string height making sure that you’re not choking out notes while playing. | Adjust the intonation of each string by comparing the pitch at the 12th fret to the open note of the same string. |
Understanding the Benefits of Proper Guitar Setup
Setting up your guitar properly is not just about ensuring it sounds good; it also has a number of benefits that can significantly enhance your playing experience. Here are some of the main advantages of having a well-maintained instrument:- Improved Playability: When your guitar is properly set up, it will play easier and feel more comfortable in your hands. This means you can spend more time focusing on your music and less time struggling with the instrument.
- Better Tone: A good guitar setup can make a huge difference in the sound of your instrument. By optimizing the string height, intonation, and other factors, you can achieve a richer, clearer tone that really sings.
- Increased Comfort and Control: When your guitar is set up to your specific playing style and preferences, you’ll be able to play more confidently and with greater control. This means you can concentrate on your technique and creativity without worrying about the instrument holding you back.
- Prolonged Instrument Life: Proper guitar maintenance can help your instrument last longer, ensuring that you can enjoy playing it for years to come.
The Role of Action and String Height
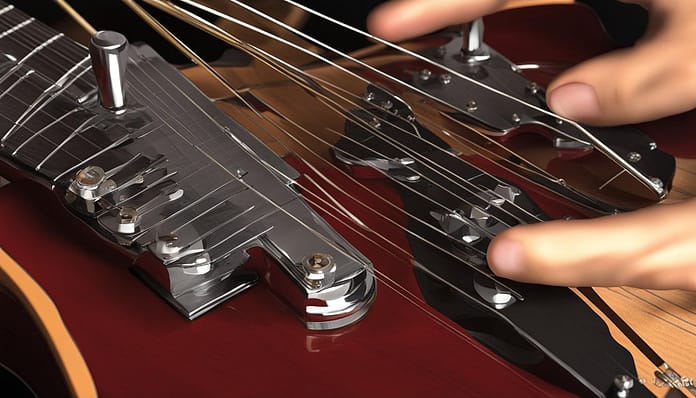
Setting the proper action and string height is a crucial step in optimizing your guitar’s playability. Action refers to the distance between the strings and the fretboard, while string height refers to the distance between the strings and the guitar’s body. Adjusting these factors will help you achieve maximum comfort and ease of playing. To begin, measure the string height at the 12th fret using a feeler gauge. Next, adjust the action by adjusting the screws on the guitar’s bridge and saddle. Take note that this process may require some experimentation and adjustment to find the perfect settings that suit your playing style. You can also adjust the action by adjusting the truss rod to achieve the desired amount of neck relief.Adjusting String Height
After adjusting the action, it’s time to ensure proper string height. Adjusting the string height can be done by adjusting the screws on your guitar’s nut and bridge. For a beginner’s guide to setting up your guitar, it’s important to know that if the string height is too high, it can be difficult to press down on the strings. Conversely, if the string height is too low, you may experience buzzing or unwanted sounds. Fine-tune the string height until it feels comfortable for your playing style.“It’s always best to make small adjustments and re-check the playability each time, rather than making large adjustments and feeling overwhelmed when the results are unsatisfactory.”
Intonation: Keeping Your Guitar in Tune
Proper intonation is a critical aspect of setting up your guitar. It ensures accurate tuning across the fretboard and consistent pitch throughout the neck. Here’s how you can adjust your guitar’s intonation:- Tune the open string: Begin by tuning the open string to the correct pitch.
- Fret the twelfth fret: Press down on the twelfth fret of the string with your finger and play the note.
- Compare the pitches: Compare the pitch of the fretted note to the pitch of the open string. If the fretted note is sharp (higher in pitch), you will need to move the saddle back a bit to lengthen the vibrating length of the string. On the other hand, if the fretted note is flat (lower in pitch), you will need to move the saddle forward a bit to shorten the vibrating length of the string.
- Repeat the process: Repeat this process for each string until the intonation for every string is set correctly.

Truss Rod Adjustment: Achieving the Perfect Neck Relief
A well-set-up guitar depends on the proper adjustment of its truss rod to achieve optimal neck relief. The truss rod, located beneath the fingerboard, is responsible for controlling the curvature of the guitar neck. It’s important to understand its role in maintaining optimal playability and minimizing fret buzz. If your guitar’s neck is too straight or has excessive relief, you might experience poor intonation due to high action, or buzzing caused by low action. The good news is that adjusting the truss rod is relatively straightforward. But if you’re not confident in doing it yourself, it’s always best to seek the help of a professional guitar setup technician. Before you start adjusting the truss rod, it’s crucial to understand the direction in which to turn it. Typically, turning the truss rod clockwise will tighten it and straighten the neck, while turning it counterclockwise will loosen it and add relief to the neck.Steps to adjust the truss rod:
- Loosen the strings to relieve tension on the neck
- Use the appropriate tool to turn the truss rod screw in the direction you need
- Make small adjustments and then wait for the neck to settle before making further changes
- Re-tune the guitar and check the relief using a feeler gauge or specialized tool
Nut and Bridge: Ensuring Proper String Action
In this section, we’ll guide you through the essential steps of setting up the nut and bridge of your guitar to achieve the perfect string action. Proper string height is crucial for comfortable playing and optimal tone, so it’s essential to get it right.The Importance of Proper String Height
Before we dive into the setup process, let’s discuss why proper string height is important. Strings that are too high or too low can cause discomfort while playing and can affect the tone of your instrument. With the right string action, you’ll find it easier to fret notes and perform bends and vibrato.Setting Up the Nut
The nut is the small piece located at the top of the neck that supports the strings. Follow these steps to set up the nut properly:- Measure the string height at the first fret using a feeler gauge.
- If the measurement is too high, file down the bottom of the nut until you reach the desired string height. If the measurement is too low, you may need to replace the nut to achieve the correct height.
- Ensure that the string slots are the appropriate size for your strings. If they are too narrow, the strings will bind and cause tuning and intonation issues.
The Bridge Setup
The bridge of your guitar is where the strings are anchored to the body. To set up the bridge for optimal string action:- Measure the string height at the 12th fret using a feeler gauge.
- If the measurement is too high, adjust the bridge saddle height by turning the screw on the bridge. If the measurement is too low, raise the saddle by turning the screw in the opposite direction.
- Confirm that each saddle is the right length for your strings. If a saddle is too short, adjust it, so the string does not slip out of the bridge, causing tuning and intonation issues.

Remember that the amount of adjustment required will depend on your individual playing style and the gauge of your strings, so don’t be afraid to experiment to get the perfect setup for you.With proper nut and bridge setup, you’ll enjoy comfortable playing and optimal tone. Ensure all steps are performed precisely, and don’t hesitate to make further adjustments until you achieve the desired result.
Regular Guitar Maintenance Tips
Regular guitar maintenance is crucial for keeping your instrument in top shape and ensuring optimal performance. Here are some valuable tips to help you maintain your guitar:- Clean your guitar regularly: Dirt, dust, and sweat can accumulate on your guitar over time, affecting its tone and appearance. Use a soft, dry cloth to wipe down your guitar after each use, and use a mild cleaner to remove any stubborn grime.
- Replace your strings: Strings are subject to wear and tear, and they can lose their tone and intonation over time. Replace your strings regularly, ideally, every three to four months, to maintain optimal sound quality and playability.
- Keep your guitar at the appropriate humidity: Extreme temperatures and humidity levels can cause your guitar to warp or crack. Keep your guitar in a room with moderate temperature and humidity levels, and consider using a humidifier or dehumidifier to regulate the humidity in dry or humid conditions.
- Protect your guitar during transportation: If you’re taking your guitar on the road, invest in a sturdy case to protect it from damage during transport. Avoid exposing your guitar to extreme temperatures or humidity levels during transit.
Conclusion
Congratulations! You’ve now learned the importance of setting up your guitar and how it can significantly enhance your playing experience. By following the basic steps outlined in this guide and ensuring regular maintenance, you’ll reap the benefits of a well-maintained instrument. Remember to take your time and be patient as you adjust your guitar’s various components to suit your playing style. Don’t be afraid to seek professional help if needed, as a professional setup can make a world of difference in your guitar’s playability and tone. Whether you’re a beginner or a seasoned player, a properly set up guitar can take your musical journey to new heights. So, keep practicing, keep playing, and keep your guitar in top shape!FAQ
Why is setting up your guitar crucial for players?
What are the basic steps involved in guitar setup?
What are the benefits of having a properly set up guitar?
How does action and string height impact guitar playability?
Why is intonation important for a guitar?
What is the role of the truss rod in guitar setup?
How do you properly set up the nut and bridge of a guitar?
What are some regular guitar maintenance tips?
Why is it important to follow a guitar setup guide?
How can proper guitar setup enhance your playing experience?
You might be interested in delving deeper into the world of guitar maintenance and setup. Speaking of guitar setup, you might find it useful to read about the history of the guitar, which provides insights into how this beloved instrument has evolved over the years. Additionally, understanding fretted instruments can enhance your knowledge on how different setups affect playability and sound. Lastly, if you’re curious about the importance of intonation in music, this article will shed light on how proper adjustments can dramatically improve your playing experience. Happy reading!
This post may contain affiliate links. As an Amazon associate, Google associate as well as associate for other programs, Guitar & Music Institute may earn commissions from qualifying purchases.


